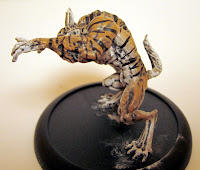
1. So to start I do a dark brown base coat over a black spray undercoat, making sure to get it everywhere. This is important as this is what will show in those hard to reach spots or deep features.
2. This is then covered in a dark brown wash to add some shading, making it easier for you to see where the high and low points are.
3. Now begins the shading colours, each layer is dry-brushed on, this enhances the appearance that the model is covered in fur. Visible brush strokes are ideal in this case. I built the colour up to light brown, the stages are below. You need to make sure you hit everywhere on the model with these layers, leaving only the deep recesses.
4. Because I am painting up a tiger I added some orange to the light brown, just to get that vibrant tiger colouring but without going to the real strong orange usually reserved for fire.
5. Now we use the same dry-brushing techniques to paint in the 'under-coat fur,' this time targeting just the chest, insides of the arms, insides of the legs and the hands and feet. This colour is built up to pure white from the light brown used at the end of step 3. The white will come through a bit darker due to the levels painted under it so wont look out of place like white sometimes can. You should also try to leave a little of the last layer visible so the blend looks more realistic. This is hard to tell from the photos.
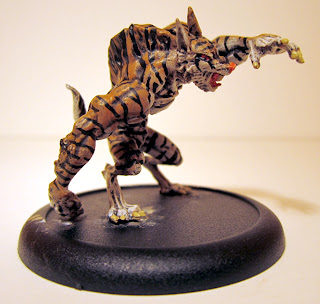
6. Now if print isn't for you this is where you would stop painting the fur and move on to finishing details. This looks quite nice and is a bit more visually appealing than just stopping at step 4 as many people do. Otherwise we press on to the stripes for our tiger. Start in the middle of the back painting down towards the chest with straight black paint. This is a good time to have a reference shot of a tiger handy. You will notice that tiger stripes don't wrap around to the other side, they start and stop erratically. This needs to be reflected in how you paint yours too.
7. Keep building up stripes down the back, stopping before getting to the shoulders and the legs. These areas need more attention to get right. The lines can and should split and change thickness as you go. Wobbly hands are OK for this!
8. When moving from the shoulders to the hands you should bend some of the stripes, they should end up wrapping around the arm, not running down its length. They should also become shorter and still shouldn't wrap all the way around.
9. The same applies to the legs as the arms, short lines, wrapping around the leg but not completely. These lines should also stop at about the knee.
10. The next step is to finish up the other arm and leg. I personally don't paint rings on the tail as it is very difficult to get looking good.
11. To finish up we paint the chest and head. This is the same as before, trying not to connect to the lines across the back. It pays to look at tiger faces for the head as well. Because the wolf head is narrower than a tigers' a 'less is more' approach is needed on the head, or it can go very badly.
12. So that is it. Just finishing details like the claws, mouth, teeth and eyes to go, then it is all finished! The final product is below.
I would quite like to see a full pack of these, I may need to pick up a few more werewolves... You can choose a colour print that fits better with your colour scheme or add some cloth scraps to tie them in properly with the rest of your force as you desire. I haven't made any such choices yet so this one is done until then!


No comments:
Post a Comment